DIY Pallet Wall without power tools
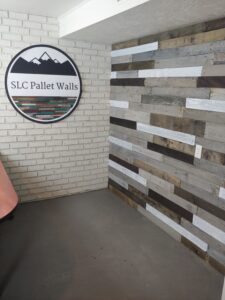
I set out to build a DIY pallet wood wall without power tools. No air compressor or brad nailer, and no power saws what so ever. With the help of my wife, we got started installing our wood on walls in our basement. We decided to use 100% real reclaimed pallet wood over our faux brick wall.
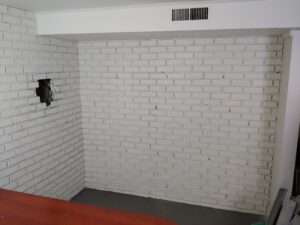
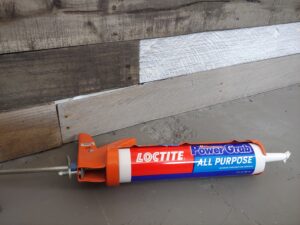
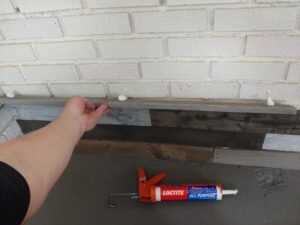
First of all shooting nails into brick (fake brick) is not safe or recommended. However, I found a product called Loctite PowerGrab with instant grab capabilities. The PowerGrab caulk is thicker than Liquid nails and prevents slippage while your boards are on the wall. If you’re not going to PowerGrab or any other kind of instant grab glue, then you’ll need to use a brad nailer or pin your wall with screws every couple of rows. If you don’t pin your wall, the pressure on the lower boards will make your wall kick out and fall down. We don’t want that.
Step 1:
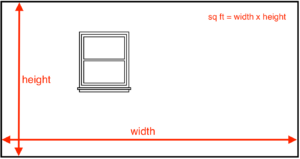
Measure your wall, length times height (in feet).
Then multiple those numbers together to get your square footage of your project. This will be the amount you’ll need to order. You’ll want to add 10-15%, just like ordering flooring. So for example, if your wall is 8 foot x 10 foot, that is 80 square feet total. Plus add your overage of 10%, which in this case is 8 sqft. So you’ll be ordering 88 sqft total. Windows and doors can also count as your overage as well.
Step 2:
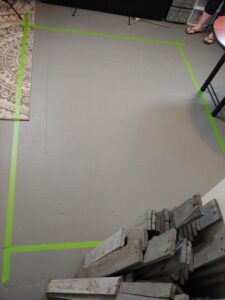
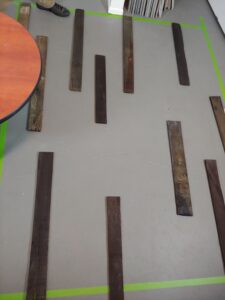
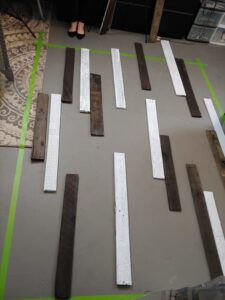
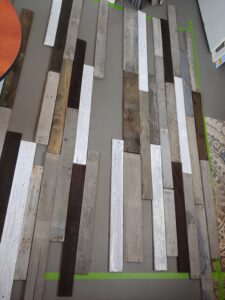
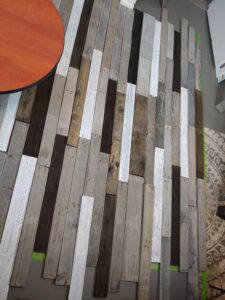
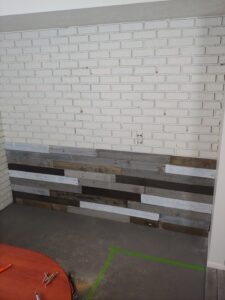
Layout your wall on the floor.
This helps to balance your colors and prevent any mistakes before hanging your pallet wall. Find an area of your home that you can lay your floor down on the ground (garage or basement). Take some masking tape or painters tape and mark off the floor the same measurements as your wall. Start by laying out your accent color(s), then slowly start adding each color on the floor, then finish laying the fill color (majority color). Once you have all your boards laid out, you can start rearranging them to balance the colors, fix any joints that are lining up, etc. The point of laying it out ahead of time is to prevent any patterns in the wall before you hang it. You don’t want your eyes catching any repeating patterns. At this point, it is not necessary to do your finish cuts on your edges, wait until your hang the board to get an exact measurement.
Step 3:
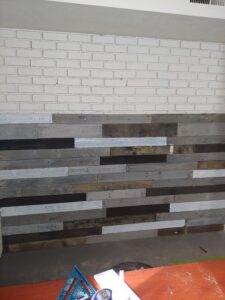
Begin hanging your pallet wall.
Start by starting at the top or bottom of your wall. Some people start at the top of their wall, which is usually straight and level. This also makes your last row end up on the bottom where most people don’t look, in case you have to rip any boards lengthwise. So unless your ground or ceilings are level, you’ll need to draw or snap a level line. Once you have a level line, build along that line, but don’t cover it up until you have the first two rows done. This will be your guide for the rest of the wall.
Remember, the width of your board will need to be the same width all the way across your wall. This is also why SLCpalletwalls.com sells wood that is all ripped to the same width to make your DIY pallet wall installation easy. So when hanging your wall, you’ll want to stagger the butt joints and make them as random as possible. You can start the wall with a full piece, but the next rows above or below should be cut pieces to start with. To cut the pallet wood, you’ll need a miter box and handsaw, the miter box will help guide your saw to make a 90 degree cut. When you approach the other side wall, you’ll need to measure, mark your board and cut the length to fit.
If using a powered circular saw, you’ll want to flip it upside down, so that the cut side is facing the ground. This prevents the saw blade from damaging the finish on the good side. Then hang that cut board with Loctite PowerGrab. Repeat this process until the wall is fully finished. You may have some outlets and light switches that you’ll need to go around, and that is normal. To cut the pallet boards to fit around the outlets, you’ll need to pull the cover plate off and unscrew the outlet from the outlet box. Carefully pull the switch or outlet out past the wall a little. Then mark and cut your boards to the exact opening of the outlet box, making sure you can still screw the screw back into the box. Once the boards are cut to fit around the box, you can push the outlet back in, making sure the tabs fit on top of the pallet boards (you may need a longer screw). Then put your cover plate back on.
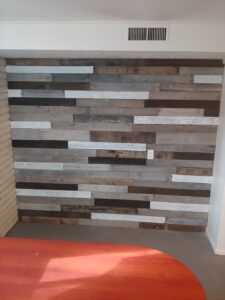
Fourth step, enjoy your new DIY pallet wall.